The pictures are all in black and white in the magazine, so I had to make them bigger than usual and fairly high quality. This makes the pictures bigger than I like file-size-wise, so you know ahead of time.
Also, I do not know if this company is still in business selling this item or not. I do not have this system, and know nothing of it other than what I read (this article), so don't ask me any questions about it. I am merely providing this article in the interest of Bronco owners.
Looks best at 800x600 or larger resolution.
![]()
"If your're the proud owner of a first-series Ford Bronco (1966 through
1977), you've wondered why this generally intelligently designed vehicle
ended up with such a lousy windshield wiper system. The whole bulky
assembly (Figure
1) hangs on the top of the windshield frame, where it threatens to
cause brain damage every time you take a bounce or hit the brakes a bit
too hard. Roll cages don't fit close to the frame because the wiper
gear is in the way, and that usually means blind spots and clumsy access
for driver and passenger alike. Its location increases the weight
of the windshield frame to where it constantly rattles and bounces around.
In general, the whole unit is a pain where you sit.
Of course, we'er assuming the old unit still works--or
works well enough to make it worth turning on. After all, many of
the early Broncos (at least the '66 and '67 models) had vacuum wipers.
Owners will testify that if you've got a light foot (put TWO eggs under
the pedal!), if the vacuum motor is in good shape, and if you don't go
too fast, you just might survive the next heavy rain (or off-road mud storm)
without a severe case of dish-pan face. If not, you know what flying
by instruments (but without the instruments part) is like.
On the other hand--if you have electric wipers,
the motor still runs, and the linkage is not completely worn out,
you may be satisfied with wipers that have no intermittent setting.
That is, until you spend an hour or two turning the wipers on and off while
cussing your way down the interstate or through heavy traffic.
Unfortunately, many of these old units are
worn out. Granted, the linkage can be rebuilt, but this is neither
cheap nor easy to do. Likewise, the wiper transmissions can be re-bushed,
but this is even more time-consuming. Even the motors are available
when they go bad--at a price.
The bottom line is this: Even if you're lucky enough
to have the original unit in working order, it's still a noisy, ugly obstruction,
and a safety hazard to boot.
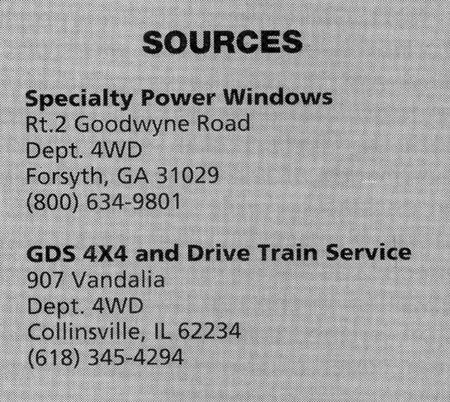
Fortunately, while checking out a street rod project
a while back, Garry Shadwick of GDS 4x4 and Drive Train had an inspiration.
The rod had a Specialy Power Windows aftermarket windshield wiper system
in it that locked as if it would fit into Garry's Bronco just right.
After a bit of measuring and a call to Ervin Castleberry, owner of Specialty
Power Windows, the great experiment was on.
Garry liked the idea of the cable-driven Specialty
system for several reasons:
1. It would clear almost everything off the
windshield frame, allowing him to install a complete roll cage with the
front bar nearly tight to the windshield frame. This would improve
vision and make getting into the Bronco a bit easier.
2. He could anchor the windshield frame to
the cage, and stop--once and for all--all that rattling.
3. The Specialty unit includes a two-speed
with intermittent and windshield washer positions--all the comforts.
4. The new unit appeared to be well-built
from high-quality parts and came complete and ready to install.
The last point is something which is worth some
discussion. As with any aftermarket part, you need to make sure that
you're getting what you're expecting. Some manufacturers use poor-quality,
obsolete, or poorly designed parts that can leave you hanging. Others
have so much confidence in their products that they guarantee the parts
only until your check clears. Others supply only part of what is
needed to install the unit; everything else is optional and at additional
cost. In short, buy from a manufacturer or supplier who will
back up its products with installation, warranty, and tech assistance,
and expect to get what you pay for. High-quality parts will not sell
for bargain-basement prices.
Garry did note one possible failing in the following
installation. Whereas he (and a great majority of Bronco owners)
has no need to drop the windshield down on the hood, if you want to be
able to drop yours, you'll have to modify the installation (more about
this later). In Garry's case, his Bronco is powered by a late-model,
Holly Pro-Jection equipped, Ford 351 Windsor, and the required hood bulge
prevents the windshield frame from dropping. Again, unless your Bronco
is strictly stock, it probably has a hood bulge for carb/air cleaner clearance,
so this won't affect you, either.
Still you say, seeing is believing. Okay.
Check out the following installation, and see if you don't agree that this
slick little aftermarket kit is a painless way to give an old blind horse
a new outlook on life. Oh, and while you're at it, keep in ind that
Garry and I installed everything you see (including the obligatory test
run and several delays, while I fumbled with the camera gear) in just five
hours.
Before demolition, we stepped back and gave the
OEM wiper unit a last (but certainly not fond) look. To give us plenty
of operating room, we pulled the soft top off (Figure
1).
Once all the old hardware was stripped, the potential
for improvement got a little clearer. Garry had the roll bar built
close to the windshield frame and down the door pillar to the floor to
preserve full entry access and provide a solid anchor for the windshield
frame (Figure 2).
With everything in place, there was excellent vision with no blind spots.
We had hardly beun before we discovered what was
to be one of only two modifications in the entire installation procedure.
The original hole through the windshield frame are approximately 5/8-inch,
while the new transmissions use a 3/8-inch OD shaft housing. The
difference could cause the transmissions to walk out of position and leak
around the gasket.
After a quick huddle, Garry came up with a simple
and effective solution. He found a pair of bushings from a Rancho
shock kit (leftovers) that have an outside dimension of 5/8-inch and an
inside dimension of 3/8-inch. (Although we were tempted to let you
think we were sharper than we were, we didn't remember until later that
this is the same as 3/8 ID steel water pipe.) Garry cut the bushings
to 1 3/8 inches to fit from the back of the transmission to just
barely through the windshield frame. With this very small lip
extending outside the frame, the original gasket was much easier to center
later on.
With the bushings ni place, we discovered the other
need for modification. The Specialty transmissions have machine screws
holding them together. The heads facing the frame don't offer enough
flat bearing area to keep the transmissions snug. The solution was
even simpler than the first. Garry grabbed a pair of 5/8 flat washers
(1/8-inch thick) and slipped one over the inner end of each bushing.
The result is pictured in Figure
3: The 5/8 flat washer (A) and the bushing (B) were slipped over
the transmission shaft housing (C). This unit was pushed through
the windshield frame, and the original 5/8-inch leather seal (D) was added
on the outside. A stainless steel 3/8-inch ID washer (E) went on
top of the seal, followed by the 3/8-inch rubber seal (F), stainless steel
3/8-inch washer (G), and nut (H) supplied in the Specialty kit. The
entire assembly was trial-fitted to make sure everything worked as planned.
Because the old and new transmissions are mounted
in identical positions, the next step was to determine the length of the
transmission shaft housing between the inner mounting surface of the windshield
frame and the bottom of the knurled pivot. We found this to be two
inches -- measured from the top of the mounting surface to the end of the
transmission shaft housing. The measurement was transferred from
the original to the new unit, as shown in Figure
4. We measured from the top of the 5/8-inch spacer washer toward
the end of the shaft housing.
After disassembling the transmission and removing
the shaft from the housing, the housing was cut at the two-inch mark described
above. Before the cutting was done, the retainer nut was threaded
on to make cleaning the threads a little easier. The cut end was
deburred. The completed transmission housing with hardware in place
is shown in Figure
5.
The transmissions were again installed in the windshield
frame and snugged down. After reading the Specialty directions, we
determined that the cable housing tube slots should be at the top on both
sides to suit the sweep pattern of the Bronco wipers. Read the
Specialty instructions carefully. Although the information is
not rocket science, and the text graphics are quite clear, failing to read
them will probably result in a botched job -- or at least a lot of redo
work.
With the transmission housings in place, the transmission
shafts were slid into place, and the supplied knurled pivots were pushed
onto them and secured with set screws. The shafts were then marked
at the top of the knurled pivots prior to cutting to length. Note
how the new shaft fits cleanly (Figure
6), and closely approximates the original installation. Once
cut, the shafts were deburred, greased well, and reinstalled. The
transmission rear covers can also be set losely in place.
Next, Garry measured from notch to notch between
the transmission, and cut one of the supplied aluminum cable housing tubes
to length. Before the installation, both ends of the tube were flared
to engage securely in the transmissions (Figure
7). The remaining piece was flared on one end and installed in
the right-side transmission in the remaining notch. The rear cover
of the right-side transmission was tightened.
At this point, the motor and the drive unit were
assembled according to the instructions. Specialty designed the motor
mounting so the motor may be rotated into any position. If you look
ahead to Figure
12, you can see the position that worked best for us.
The new wiper switch was installed in place of the
old switch. Again going from a supplied wiring diagram, the motor
and switch were wired temporarily. The junction block on the motor
uses spade clips, so the wires can be easily removed and replaced.
The purpose of the temporary wiring is to make certain that all motor settings
are functioning properly, and that the motor is in parked position
prior to taking the next step.
With the motor in parked position, the drive wheel
was installed according to the instruction sheet. A series of holes
located in the drive wheel represent 10-degree changes in wiper sweep,
starting close to the center at 90 degrees (Figure
8). The wiper sweep angle for the Bronco is 110 degrees, so the
third hole from the center is used. In addition, the cable must slide
outward to rotate the transmission gears in the proper direction, so the
hole is positioned exactly in line with the center of the cable glide and
motor shaft, and as far away from the cable glide as posible. The
drive wheel retainer nut was tightened to maintain the wheel in this position.
Take care not to rotate the motor while tightening the retainer nut.
The remaining 36-inch section of aluminum cable
housing was slid through an opening between the dash and the door pillar
(Figure 9), and
pre-bent to fit between the left-side transmission and the mounting position
of the drive assembly under the dash. We used a combination of careful
measurements, and slow, careful bends to get it fitting well. Note
that the housing should not be bent at over a three-inch radius, and that
four to five inches of straight tubing should be maintained coming out
of both the transmissions and the drive unit for smooth operation.
This was one of the most tricky parts of this installation, and required
a good supply of patience -- don't slam-bang this part, or you'll regret
it.
The finished tube skirts the windshield glass, and
fits close to the raised lip carrying the door wetherstrip, but does not
impair vision at all (Figure
10).
As indicated previously, we believe that this system
can be altered to allow the windshield to drop. If you were to cut
the housing tube shown in Figure
10 at a point near the windshield frame hinge pivot position and slip
a section of 3/8 ID spring tubing over both ends, the housing could bend
at that point. The cable would have to be left somewhat longer overall
to accomodate the increased housing length as the windshield frame tilted
forward. The only drawback would be the need to remove the wiper
arms when lowering the windshield frame (the moving cable would put them
out of working range). If someone tries this variation, I'd like
to hear about how well it works for you.
Going on, Garry loosened this
last cable housing tube and pushed it down under the dash to make final
mounting to the drive unit easier. He greased the drive cable with
lots of wheel bearing grease, pushing it into the housing and through the
transmissions, while I guided the cable in the gap between the left transmission
and the housing tube. Garry pushed the housing tube into the notch
in the nylatron glide and installed the linkage arm between the third hole
in the drive wheel and the hole in the cable end block (Figure
11). He used lots of grease here, too.
We had previously checked
mounting hole positions for the drive assembly. The holes (with mounting
hardware) provided worked well on the bottom (X), but interfered with the
door pillar reinforcement at the top (Z), so two new holes were drilled
in the housing prior to assembly (Y).
We used the original upper
holes and hardware to retain the drive assembly housing cover -- which
kept all the pieces in place while we mounted the drive unit. In
Figure 12, you
see the assembled unit ready to be guided into final position. With
Garry under the dash and feeding the tube housing upward, while I was up
top guiding it into place, the drive unit was located, and four holes were
drilled for mounting hardware. Although the unit is relatively light,
a good mount means quiet operation without rattles, so take the time to
make it right. The wiring was reconnected in Figure
13. Note that the fuse panel appears quite close to the motor
unit, but this is an illusion caused by the camera angle and lens; there
is plenty of room.
After checking that the unit
worked as we'd expected, the wiper arms were reinstalled one by one
and checked for proper positioning and parking. The tube housings
were fastened to the windshield frame using two nylon pre-fabricated tubing
clamps secured by machine screws. The view of the finished project
before the roll cage was mounted (Figure
14) shows a big improvement over the original hardware. Both
Garry and I were impressed by how smoothly and quietly the Specialty system
works." ![]()
e-mail me at i6735189@wsunix.wsu.edu.